Introduction: If you plan to remove and sell a used exhaust unit, good documentation matters more than many people think. A few clear photos, the right invoice, and accurate VIN details can speed up evaluation, shorten payment time, and help answer basic ownership questions if anyone asks later. Whether you are dealing with a private buyer, a dismantler, or a company buying scrap catalytic converters, a simple record set makes the whole process smoother. If you want the plain-language version of what is a catalytic converter, it is the emissions-control part in the exhaust system that helps reduce harmful gases.
Key Takeaways
- Take wide shots before removal and close-ups after removal.
- Photograph the part in place, not just on the ground.
- Keep VIN photos, invoices, and any repair notes together.
- Readable markings help buyers identify the unit faster.
- Mixed or blurry images often cause delays.
- Good records can reduce awkward ownership questions.
- Store everything in one folder before you travel to sell.
Why should you document the part before removal?
You should document it before removal because proof is strongest when the part is still attached to the vehicle. That simple step helps show source, condition, and fitment.
Many delays happen because a seller only takes one photo after the unit is already off the car. At that point, a buyer can see the shell, but not the vehicle it came from, the exhaust layout around it, or the markings that were easier to read before dirt and handling changed the view.
Good records also help when a buyer asks normal traceability questions. That is not unusual. It is part of careful trade. If you are selling in Latvia, this guide on where to sell catalytic converters safely and legally in Latvia is a useful local read.
A clean paper trail can also reduce tension if police or transport inspectors ever ask where the part came from. You do not need a huge file. You need a clear one.
What photos should you take before any tools come out?
Start with wide shots, then move closer. The goal is to show the vehicle, the location of the part, and the identifying marks in a clear sequence.
Think of your photos as a short visual story. Anyone reviewing them should be able to understand three things fast: which vehicle the unit came from, where it sat on that vehicle, and what markings or features identify it.
What should the first wide shot show?
The first wide shot should show the whole vehicle or a large part of it. It should be easy to tell that the car exists and that the photos belong to that car.
Take one image of the full side of the vehicle and one from a front or rear angle. If possible, include the registration plate in at least one of those images. Then take an under-car view that shows where the exhaust section sits before removal. This helps connect the unit to the vehicle and gives context that close-up photos cannot provide.
What close-ups matter most?
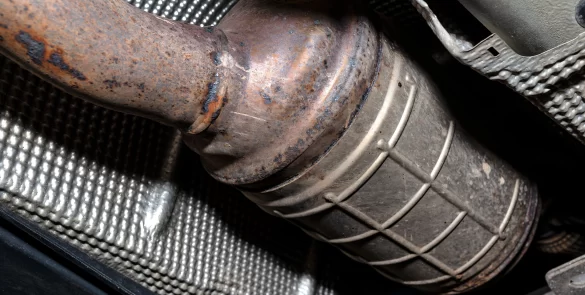
The most useful close-ups show the part in place, the code or stamp, and the surrounding welds or pipes. These details help with identification and condition checks.
Take a close image of the shell while it is still mounted. Then photograph any stamped numbers, etched codes, labels, or brand marks. If heat shields or dirt block the mark, take more than one angle. A flashlight often helps. Also photograph the inlet and outlet area as much as you can before removal, plus nearby oxygen sensor positions if visible. Those small details can help a buyer match the unit to the correct vehicle type.
What should you shoot after removal?
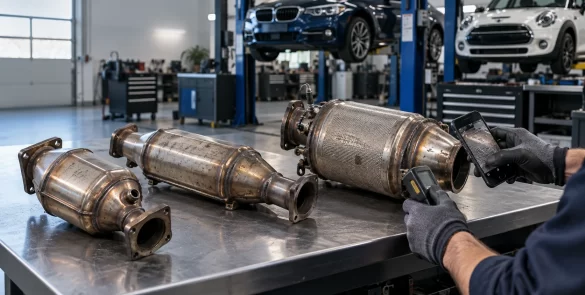
After removal, take photos of both ends, both sides, and any visible markings again. Show the unit alone on a clear surface.
Do not toss it into a mixed metal pile and then start taking pictures. Place it on cardboard or a clean floor. Photograph the shell, the pipe ends, and any damage such as fresh cuts, dents, broken flanges, or heavy rust. If there is a serial or model marking, take one close-up and one medium shot so the reviewer can see both the detail and where it sits on the shell.
Photo checklist: which images help prove source and condition
| Shot type | What to include | Why it helps |
|---|---|---|
| Vehicle overview | Whole car, side view, plate if visible | Shows the part came from a real vehicle |
| Under-car view | Exhaust route and mounted position | Connects the unit to that car |
| In-place close-up | Shell, pipes, nearby fittings | Helps identify fitment and layout |
| Marking close-up | Stamped code, etched mark, brand label | Speeds identification |
| Removed unit, full view | Both sides on a clean surface | Shows general condition |
| Ends and cuts | Inlet, outlet, flanges, fresh cuts | Helps review damage or missing sections |
Which documents should you keep?
Keep any document that links the vehicle, the owner, and the removal event. Even basic paperwork can save time later.
The most useful set usually includes the vehicle registration or title copy, a repair invoice if a workshop removed the part, and a note with the date of removal. If the unit came from a dismantled vehicle, keep the vehicle details with the photo set, not in a separate folder that gets lost later.
Is an old service invoice still useful?
Yes, it can be very useful. A repair or service invoice helps show the vehicle existed, the workshop handled it, and the part was removed during a real job.
Even if the invoice does not list every code on the shell, it still gives context. It can show the car owner, the registration number, the workshop name, and the date. That is often enough to support the rest of your file.
What if the unit came from a car you are dismantling?
If it came from a dismantled car, keep the vehicle record and your removal note together. Make sure the VIN appears in both your images and your written notes.
Recordkeeping matters in this trade. The rules described by the Oregon DMV reflect how important VIN-linked records and seller information are in dismantling work. You may not need the same exact format everywhere, but the principle is clear: traceable material is easier to review and easier to accept.
That is also why businesses buying scrap car catalytic converters often ask for more than one proof point. They are not trying to make life hard. They are trying to verify source, match the unit, and avoid problems later.
Should you keep a simple removal note?
Yes. A short note is better than relying on memory.
Write down the date, vehicle make, model, engine type if known, VIN, and who removed the part. Add where the unit is stored and how many pieces you removed. If you have more than one vehicle on site, assign each unit a folder name or bag label that matches the VIN note. That single habit prevents mix-ups.
How does VIN data help with valuation and traceability?
VIN data helps because it ties the part to one specific vehicle. That makes identification easier and reduces guesswork.
A buyer may already recognize a shell shape or a code, but VIN-linked details make the review more reliable. The reviewer can compare the vehicle type with the physical unit shown in your photos. If the shell looks right and the VIN data fits the story, the decision tends to move faster.
Which VIN photos are most useful?
The best VIN photos are clear, readable, and taken from more than one location. One image is good, but two is safer.
Take a photo of the VIN through the windshield if visible. Then take another of the door-jamb sticker or plate. If the vehicle has another readable manufacturer plate, save that too. Make sure the lighting is good and the full code is visible, not cut off at the edge of the frame.
Should you write the VIN in a note too?
Yes, always. A typed or handwritten note gives you a backup if one image becomes blurry or is lost.
Use the same spelling and number sequence as shown on the car. If you are sending records by message or email, paste the VIN in plain text as well. That lets a buyer copy it without reading from a photo. For firms buying scrap catalytic converters in Riga, that small detail can make remote review much quicker.
If you want more background on how a local buyer presents its process and approach, this overview of Metalbee as a reliable partner in converter purchasing and recycling gives useful context.
What details speed up evaluation and payment?
Clear identification details speed things up most. Good photos, readable markings, and matched paperwork reduce back-and-forth.
Buyers usually lose time on the same issues: blurred code shots, missing VIN images, and mixed batches from different vehicles. If your file is complete, the review is simpler. That often means fewer messages, less waiting, and a faster handover.
Should you clean the shell before photos?
A light wipe is fine, but heavy cleaning is not needed. The goal is to reveal markings, not change the item.
Use a dry cloth or soft brush if dirt hides the code. Do not grind, cut more than needed, or alter the shell just to make it look better. Fresh tool marks can create confusion. Natural condition is easier to assess than a shell that has been heavily worked on.
Do duplicate files help?
Yes. Keep one copy on your phone and one in cloud storage or email.
Name the folder with the date and the VIN. Put the photos first, then invoices, then notes. If you hand the unit to a driver or a colleague, share that folder before the trip. It only takes a minute, and it can prevent a long delay if questions come up later.
Documentation set: what helps a buyer review faster
| Item | Minimum version | Better version | Common delay if missing |
|---|---|---|---|
| Vehicle proof | One full-car photo | Full-car photo plus plate view | Buyer cannot link the unit to the car |
| Mounted location | One under-car image | Wide and close mounted images | Fitment is harder to confirm |
| Identification mark | One readable code photo | Two code photos from different angles | Code cannot be read with confidence |
| VIN record | One VIN image | VIN images plus typed note | Extra follow-up questions |
| Paperwork | Basic invoice or ownership note | Invoice, registration copy, removal note | Review and payment may slow down |
What mistakes cause delays or extra questions?
The biggest mistakes are poor photo order, missing source details, and incomplete paperwork. Most of them are easy to avoid.
Start with the most common problem: random images sent with no story. If a buyer receives one photo of a loose shell, one cropped invoice, and no VIN, the review becomes guesswork. That can lead to extra questions, slower approval, or a request for new photos.
Another issue is mixing several units from different vehicles into one pile. Once that happens, codes and paperwork can get crossed. Keep each unit separate until the deal is done.
According to the California Air Resources Board, theft deterrence includes keeping identifying records and making the part easier to trace. That fits the same logic here: the better your records, the easier it is to show legitimate source.
- Do not send only after-removal photos.
- Do not crop out the VIN or plate by accident.
- Do not photograph codes in dim light.
- Do not mix paperwork from different vehicles.
- Do not throw away old service invoices too quickly.
- Do not rely on memory for removal date or source.
What does a simple same-day checklist look like?
A same-day checklist can be done in about ten minutes.
Follow the same order every time so nothing gets missed.
- Photograph the full vehicle.
- Take one under-car shot showing the mounted position.
- Take close-ups of the shell and any visible markings.
- Photograph the VIN from at least one location.
- Remove the unit.
- Place it on a clean surface and photograph both sides and both ends.
- Save or scan the invoice, registration copy, or removal note.
- Name the folder with the date and VIN.
- Keep the unit separate from other scrap until the sale is complete.

If you follow that routine each time, you will spend less time answering the same questions again and again.
Summary
Documenting a used exhaust unit before removal is not busy work. It is a practical way to prove source, support identification, and avoid delays. The strongest set includes wide vehicle photos, in-place images, clear marking shots, VIN photos, and basic paperwork kept in one folder. When every photo and document matches the part, a buyer can assess the catalytic converter with less back-and-forth. If you want a clear process for handover and review in Latvia, Metalbee offers a focused service for this type of material.